Android: How To Create A Locked Photos Folder?
Need to safeguard your photographs and recordings from meddlesome eyes? This is the way. Did you know that Google Photos on Android licenses you to make a locked envelope? How is it that you could have to make such an envelope? Since you want to take photographs of your documents, like your inoculation cards or driver’s grant, you have them sufficiently close, similar to pictures or accounts you don’t want to see. You can make a got envelope in Google Photos on an Android cell for these photographs and store them safely there.
Moreover, the ideal way to see those photos again is to use affirmation to open the screen. There is a detriment to using a Locked Photos Folder, in any case. Photos and accounts in this envelope are not accessible to your cloud account. So pick the photos and accounts you want to lock keenly. Then again, shockingly better, guarantee you have a copy of this envelope saved in a safe (mixed) coordinator on your nearby machine. To set up a got envelope in Google Photos on Android 12. This association should likewise work, paying little notice to devices for whatever length of time your phone’s working framework interpretation is identical to or more modern than Android 12.
Also Read: How To Fix Err_Address_Unreachable Error In Google Chrome?
How To Create A Locked Photos Folder?
Open Google Photos on your Android gadget. In the main Library window, tap Steady Thoughts.
In the window that appears, tap Configuration Locked Envelope. Beginning here, Android doesn’t allow taking screen captures (because the system considers the region fragile). To consent to the standards carefully, you can loosen up. It’s clear. On the screen, tap Plan in the lower right corner of the screen.
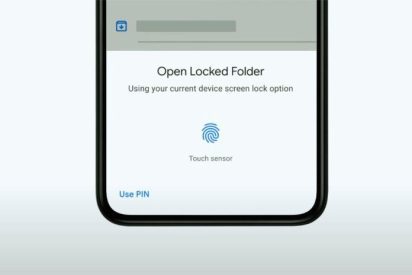
You will then, at that point, be prompted to endorse utilizing your default open system (novel engraving, face certification, PIN, or model). Upon good endorsement, you will be welcomed with a window that doesn’t say anything yet and a Move Things button. Utilizing the record selector, add the best pictures to your locked envelope. You will again be actuated to approve. Starting there forward, Android will give you a last warning communicating:
- Related photos (counting copies and changed interpretations) will not be moved.
- Things will be deleted, and accepting Google Photos will be uninstalled.
Tap Continue, then, at that point, tap Move (when incited). Google Photos will make the locked coordinator and add the picked photos.
How To Access The Locked Folder?
Since you have made the locked envelope and added photographs or recordings, how would you get to it? It is exceptionally straightforward. Open Google Photographs, click on Utilities, and look to the lower part of the page, where you will see the Locked Organizer section.
Tap that section, and you’ll see all the photographs and recordings you’ve added to the locked organizer when you effectively validate. Utilize this element carefully! Likewise, keep prying your eyes on your most delicate pictures. I suggest involving this element for anybody who keeps photographs of driver’s licenses, charge cards, inoculation records, etc. This additional security can assist you with keeping the data you don’t need any other individual to get to.
Also Read: Mobiles As PCs: Here’s How To Turn An Android Into A Computer